
Squarebody Speaker Impedance: What to Run
You bolt a fresh pair of 6.5-inch speakers into your Squarebody, turn up the radio, and something is off. Maybe the new speakers are quieter than the old ones. Maybe the head unit gets hot. Maybe an amp keeps going into protect. Most of the time, the problem is not the speaker brand or a bad install. It is Squarebody speaker impedance and a mismatch somewhere in the system.
Impedance is one of those audio terms that gets tossed around without much explanation. It matters because it determines how much electrical load your radio or amplifier sees. Get it right, and your system plays clean and lives a long life. Get it wrong, and you can leave power on the table or cook equipment that was never built for that load.
What Speaker Impedance Actually Means
Speaker impedance is measured in ohms, shown with the omega symbol: Ω. For most truck audio, you will run into 2-ohm, 4-ohm, and sometimes 8-ohm speakers. A lower number is a heavier load on the amplifier. Think of it like asking the amp to move more current through the same channel.
A 2-ohm speaker does not automatically sound better than a 4-ohm speaker. It simply lets a compatible amplifier make more power, assuming the amp is designed to handle 2 ohms. That extra output comes with more heat, more current draw, and more demand on the wiring and electrical system.
For a simple front-speaker upgrade in a 1973-1991 Chevy or GMC truck, 4-ohm speakers are usually the sensible place to start. Most aftermarket head units and four-channel amps are happy there. It is a safe, common setup that gives you plenty of speaker choices without making the wiring harder than it needs to be.
Nominal Impedance vs. What Your Meter Reads
The impedance printed on a speaker box is a nominal rating, not a fixed number you will read at every frequency. A speaker labeled 4 ohms may show closer to 3 or 3.5 ohms when checked with a basic multimeter. That reading is DC resistance, often called DCR. It is useful for checking whether a voice coil is open or shorted, but it does not change the speaker's advertised nominal impedance.
Do not see 3.2 ohms on the meter and decide you bought a 2-ohm speaker. Read the label, the spec sheet, or the model number. That is the rating you use when matching gear.
Match the Speaker to the Radio or Amplifier
Before buying speakers, look at what is powering them. There is a big difference between a pair of door speakers running off a head unit and a pair running from a dedicated amp.
Most aftermarket head units are built around a 4-ohm speaker load. Some may be rated to run lower, but that is not something to assume. Check the owner's manual for the minimum speaker impedance. If the radio calls for 4 ohms per channel, wire one 4-ohm speaker to each channel and call it good.
Running a 2-ohm speaker on a head unit that is only stable at 4 ohms can make the internal amp run hot, distort sooner, or shut down. Old Squarebody cabs do not have much insulation from engine, exhaust, and summer heat to begin with. There is no reason to add unnecessary heat inside the dash.
An external amplifier gives you more options, but the same rule applies: know the amp's minimum rated impedance. A quality four-channel amp may be stable at 2 ohms per channel, which can work well for certain setups. Still, 4 ohms per channel is often the cleaner, easier choice for door speakers, especially on a daily-driven C10, K10, K5 Blazer, Jimmy, or Suburban.
Power ratings matter too, but they come second. Match speaker RMS power handling to realistic amp output at the impedance you are actually using. An amp might make one power number at 4 ohms and a higher number at 2 ohms. Make sure you are reading the correct line in the amp specs.
Squarebody Speaker Impedance and Wiring Choices
The wiring method can change the load your amp sees. This is where good installs get separated from systems that keep blowing fuses or dropping into protect.
When you wire two same-impedance speakers in parallel on one channel, the load goes down. Two 4-ohm speakers wired in parallel create a 2-ohm load. That can be fine if the amp is rated for 2 ohms per channel. It is not fine if you are using a head unit or an amp that needs to see 4 ohms or more.
When you wire two 4-ohm speakers in series, the load goes up to 8 ohms. That is easier on the amplifier, but it generally reduces the power available from that channel. Series wiring has its place, but it is rarely the best answer for a straightforward front-door speaker setup.
The simple setup is usually the best one: left speaker on the left channel, right speaker on the right channel. Each channel sees one speaker at the impedance it was designed to run.
Do Not Double Up Door Speakers on a Head Unit Channel
It is tempting to add extra speakers because a Squarebody cab can feel big and bare compared with a newer truck. But tying multiple speakers into one radio channel without doing the impedance math is a fast way to overload the radio.
If you want front doors, rear cab speakers, and a subwoofer, use the right number of amplifier channels or a properly planned system. More speakers are not automatically more volume or better sound. Placement, tuning, and clean power matter more than stuffing every open panel with drivers.
Component Speakers Need Their Crossovers
A component set uses a separate woofer and tweeter, along with crossover networks that divide the music into the frequencies each speaker is meant to handle. The supplied crossover is part of the system. Use it as directed.
The woofer and tweeter in a component set are not usually treated as two random speakers to wire together however you want. The crossover controls the load and protects the tweeter from low-frequency bass that can damage it. One component set per front channel is commonly rated as a 4-ohm system, but verify the manufacturer's rating before wiring.
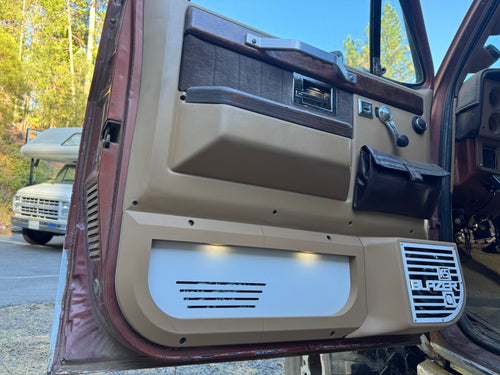
If you are installing 6.5-inch components in lower door panels, make sure the speaker depth, window travel, wiring route, and panel fit are all handled before final assembly. A clean-looking panel does not help if a loose wire catches the window mechanism or a speaker terminal touches metal behind the door panel.
Subwoofer Impedance Is a Different Conversation
Door speakers are usually simple. Subwoofers can get complicated fast because many use dual voice coils. A dual 2-ohm or dual 4-ohm subwoofer can be wired in more than one way, changing the final load at the mono amp.
This is where you need to work backward. First, find the minimum impedance your mono amp is stable at. Then choose the subwoofer voice-coil configuration and wiring method that gives the amp a safe final load. Do not buy a sub based only on its peak power number or the size of the cone.
A mono amp rated for a 1-ohm load may make its biggest number there, but 1 ohm also puts the most demand on the electrical system. For a truck that sees real road miles, trail time, or long summer cruises, a slightly higher impedance load can be the smarter move if it keeps the system cooler and more reliable.
A Practical Plan for Most Squarebody Door Speaker Upgrades
For a basic system, run one quality 4-ohm 6.5-inch speaker in each front door, one speaker per left and right channel. If you are using an aftermarket head unit, use the radio's speaker outputs and keep the wiring clean. If you want more volume and better control, add a properly sized four-channel amp and set the gain correctly.
Gain is not a volume knob. Set it so the amp reaches clean output without clipping. A speaker can be damaged by a small amp driven into distortion just as easily as it can be damaged by too much clean power. Use solid connections, protect wiring where it passes through metal, and make sure every speaker is in phase - positive to positive, negative to negative.
For a system with a subwoofer, let the door speakers handle mids and highs, then use high-pass filtering to keep deep bass out of them. That takes strain off the small door speakers and usually makes the whole truck sound cleaner. The sub gets its own amp channel or mono amp, wired to a load that amp can safely handle.
A Squarebody audio build does not need to be complicated to sound good. Start with the correct impedance, give every channel a load it can handle, and build from there. The best system is the one that fits the truck cleanly, plays the way you want, and still works right after a long drive home.
Need The Parts For This Build?
We carry everything mentioned in this guide — picked and backed by real Squarebody owners.
0 Comments
Leave a Comment